Safest PvE Strategies for Stella Montis Farming in ARC Raiders 2026 — Low Risk, Maximum Returns
Here's the contradiction at the heart of Stella Montis: it's simultaneously the best map in ARC Raiders for loot value and the one most players avoid because "every time I go there I get shot and lose everything."
Both observations are correct. And the gap between them is entirely explained by strategy, not gear.
Stella Montis is PvP-heavy by design — narrow corridors, tight enclosed rooms, vertical terrain, and extremely dense high-value loot that pulls every Raider toward the same three or four POIs at the same time. The players who run it profitably aren't tougher or better at gunfights. They're smarter about when they loot, where they move, which hatch they exit from, and what system they use to ensure that even a bad raid never costs them more than they can afford to lose.
This guide gives you that complete system — from loadout philosophy to exact room-by-room routes to the three safe extraction hatches that 90% of players never use. After reading this, Stella Montis stops being the map you fear and becomes the map you choose when you want maximum returns per session.
🧠 Understanding Why Stella Montis Feels Dangerous (And How to Fix It)
Before strategy, you need to understand the structural reasons Stella Montis creates more PvP than other maps — because each reason has a direct tactical counter.
The Four Structural Problems
1. Everyone knows where the loot is
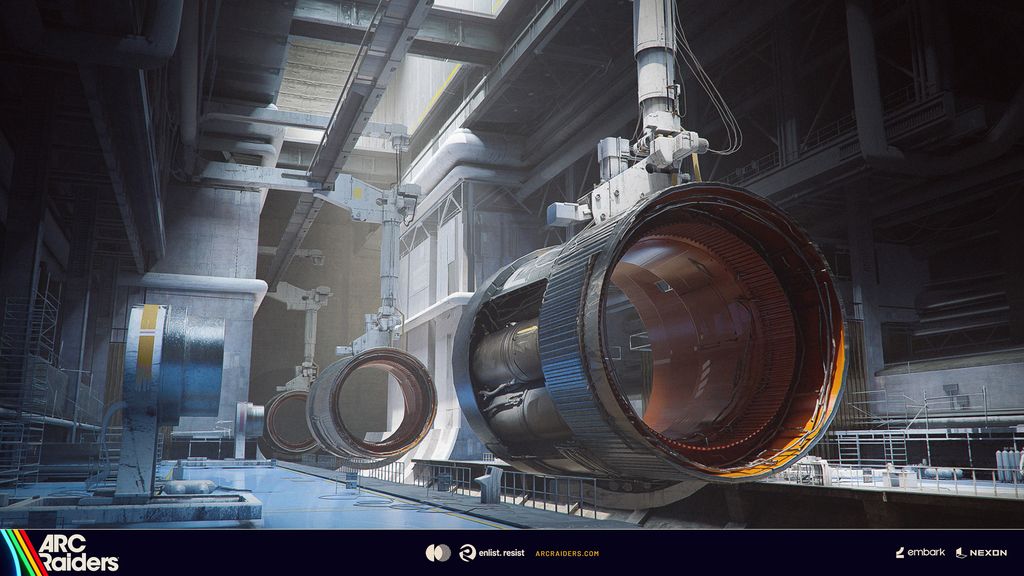
Unlike Blue Gate's underground or Buried City's hidden apartments, Stella Montis's best loot — Assembly Workshops, Cultural Archives, Medical Research — is clearly marked on the map. Every player deploys with the same destination in mind. This creates inevitable converging paths early in each raid.
Counter: Don't deploy with the same destination as everyone else. Start at the map's periphery and work inward after the initial traffic clears.
2. Narrow corridors funnel confrontations
The map's layout is compressed and vertical. Long sightlines are rare. Most fights happen at very close range in hallways and doorways — environments where weapon skill matters less than surprise and positioning.
Counter: Move through corridors with awareness before committing. Use door frames. Never run through hallways — walk carefully and listen for footstep audio.
3. High loot density creates "sticky" behavior
Players who find good loot in a room tend to slow down and stay longer, creating predictable long-duration presences in specific rooms. If you see a door that's open or a container that's been looted, someone was there recently — or still is.
Counter: Treat every looted container as a "player was here" signal. Adjust your route to avoid recently looted areas.
4. PvP matchmaking amplifies itself over time
Embark Studios has confirmed a behavior-based matchmaking mechanism in ARC Raiders. Players who engage in frequent PvP get matched into lobbies with more PvP players. Players who extract and avoid combat gradually get matched with more peaceful lobbies.
Counter: If you're being wiped constantly, consider intentionally avoiding all combat for several sessions. Your matchmaking pool will shift toward less aggressive players. Then bring in a proper loadout once you're in quieter lobbies.
⚙️ The Optimal Safe Loadout Setup for Stella Montis
Your loadout is your first line of defense — not through raw power, but through the economic protection it provides. Here's how to build it:
🎽 Loadout Philosophy: "Custom Free" Setup
The core insight from every community guide agrees on this: use a custom loadout, not a free loadout. Here's why:
- A free loadout costs nothing but gives you no Safe Pocket
- A minimal custom loadout (1-slot worth of cheap gear) costs almost nothing AND gives you a Safe Pocket for your most valuable item
- The Safe Pocket survives death — meaning a 10,000-coin Music Box in your Safe Pocket is safe even if you get wiped
The "Custom Free" Setup:
- 1× cheap weapon (any low-tier weapon from stash or Speranza vendor)
- Small shield (1-slot, minimal cost)
- 1× Herbal Medkit
- Total cost: 1,000–2,000 coins maximum
- Safe Pocket: Active
If you die, you lose 2,000 coins of gear. But your Safe Pocket item survives. As long as your Safe Pocket holds anything worth more than 2,000 coins — which on Stella Montis it always will — every run is profitable even on death.
🎒 Augment: Looting Mk.2 or Mk.3
- Looting Mk.2 minimum — faster container interaction speed means you spend less time exposed while looting
- Looting Mk.3 (Survivor variant) if you have it — protects your most valuable equipped item on death on top of the Safe Pocket
🩺 Utility Items
- 1–2× Adrenaline Shot — burst movement speed for escaping gunfights you didn't choose
- 1× Smoke Grenade — create instant disengagement cover when spotted
- Skip heavy combat tools — you're not here to fight
👟 The Weight Rule
Keep your loadout light. Heavier gear means slower movement, louder footsteps, and longer reaction times. On a map built around close-range surprise encounters, mobility is survival. If your loadout is slowing you down noticeably, it's too heavy for this strategy.
🗺️ The Three Safe Extraction Hatches — Learn These Before Anything Else
This is the most critical piece of tactical knowledge for Stella Montis farming. Standard extraction points are contested and well-known. Raider Hatches are your primary exit strategy — and knowing all three means you always have an escape route no matter where on the map you are when you decide to extract.
🟢 Hatch 1: Assembly Workshops Hatch (South-East Corner of Workshops)
Located in the bottom right corner of the Assembly Workshops area. This is the most convenient hatch because it sits directly adjacent to the highest-value looting zone. The ideal flow: spawn on the western side, loot eastward through the workshop stands, exit at this hatch. Minimal exposure, maximum efficiency.
Best used when: You've filled your bag in the Assembly Workshops and want to extract before pushing into the higher-risk Medical Research area.
🟡 Hatch 2: Eastern Tunnel Hatch
Located in the eastern tunnel section — a transitional zone between the main Stella Montis body and the Seed Vault. Not many players loot this area, making it one of the quieter extraction points on the map.
Warning: The tunnel is very dark. Without your flashlight equipped, visibility drops to near zero. Check corners before entering — the darkness that protects you from other players also protects campers from you.
Best used when: You've looted the eastern sections (Cultural Archives, Medical Research east rooms) and don't want to cross the central PvP zone to reach other hatches.
🟢 Hatch 3: Sandbox B Hatch (Far South)
The safest Raider Hatch on the entire map. Located on the southern outskirts of Stella Montis — ARC enemies don't patrol here, and players rarely cross the whole map to reach this extraction. Unless someone specifically camps it (very rare), you can extract here completely uncontested.
Best used when: You've looted the Lobby area, the southern corridor, or the Seed Vault and want a guaranteed clean exit.
Rule: At the start of every Stella Montis run, identify which of these three hatches is closest to your intended loot path. Plan your looting arc to end near a hatch, not loop back to the center for a contested extraction.
🛤️ The 5 Safe Solo Loot Routes — Organized by Risk Level
Route 1 — Absolute Safest: Assembly Workshops Hatch Loop
Risk: Very Low | Expected Return: 30,000–50,000 coins | Time: 5–7 minutes
This is the route documented in the "No PvP Solo Stella Montis" money guide — consistently generating 45,000–65,000 coins per raid with near-zero forced PvP contact.
Step by Step:
- Spawn on the western side of Stella Montis
- Enter the Assembly Workshops from the western entrance (less traffic than the central main entrance)
- Immediately go to the white and yellow stands between the workshop rooms — these are the highest-density Epic-item spawn points. Loot every stand systematically
- Move to the main workshop floor — loot weapon cases and industrial containers
- Check the adjacent staff room (breach the side door) — lockers, medbags, grenade cases inside
- Do not push north toward Medical Research — that zone has the highest PvP activity on the map
- Safe Pocket your best item the moment you find anything worth 3,000+ coins
- Exit via the Assembly Workshops Hatch (south-east corner)
Why it works: You never enter the contested red zones. You never cross the central PvP corridor. You loot the single highest-value container cluster on the map and exit immediately.
Route 2 — Low Risk: Rocket Thruster Breach Rooms Loop
Risk: Low | Expected Return: 40,000–70,000 coins + blueprint probability | Time: 7–10 minutes
The community's best-documented Stella Montis secret — the two breach rooms hidden inside the rocket thruster areas of the Assembly Workshops. Most players walk right past both of them.
The Two Thruster Rooms:
Thruster Room #1:
- Located inside the first large rocket assembly area in the workshop
- Access: Parkour jump from a specific catwalk angle to reach the breach panel (the angle is non-obvious — approach the catwalk from the north side, not the south)
- Inside: 2–3 containers including Exodus Modules, Epic crafting materials, weapon case probability
Thruster Room #2:
- Located in the adjacent rocket assembly bay
- Access: Straightforward jump from the walkway on the right side of the bay
- Inside: Similar container quality — Epic materials, weapon cases, rare component probability
Full Route:
- Spawn and enter Assembly Workshops (western entrance)
- Loot workshop stands (same as Route 1)
- Navigate to Thruster Room #1 — catwalk parkour jump, breach, loot
- Navigate to Thruster Room #2 — walkway jump, breach, loot
- Check staff room (side breach)
- Exit via Assembly Workshops Hatch or push south to Sandbox B Hatch if bag is full
Why it works: Both breach rooms require knowledge to access and are almost never competed over. Exodus Modules alone from these rooms can be worth 2,750–5,500 coins per unit. A good double-thruster run regularly produces 60,000+ coins.
Route 3 — Low-Medium Risk: Cultural Archives + Eastern Tunnel Exit
Risk: Low-Medium | Expected Return: 50,000–80,000 coins | Time: 8–11 minutes
The Cultural Archives are one of the best trinket rooms in the game but require crossing slightly more of the map than the pure workshop route. The key is routing around the Medical Research zone (highest PvP activity) rather than through it.
Step by Step:
- Spawn on the eastern side of Stella Montis if possible
- Navigate to Cultural Archives via the eastern corridors (avoid the central main thoroughfare)
- Clear all cultural containers — Music Albums (3,000), Painted Boxes (2,000), Pottery (2,000), Statuettes (3,000)
- Safe Pocket your most valuable trinket immediately
- Check the adjacent medical rooms east of the Archives (lower PvP than main Medical Research)
- Do not push into central Medical Research — redirect south
- Exit via the Eastern Tunnel Hatch
Why it works: Cultural Archives sit slightly east of the main PvP corridors. Coming in from the eastern map edge avoids the central traffic entirely. The Eastern Tunnel exit lets you leave without crossing any contested zones.
Cold Snap bonus: During Cold Snap events, Breathtaking Snow Globes (7,000 coins each) and event-exclusive items spawn significantly more often in Cultural Archives. Prioritize this route specifically during Cold Snap.
Route 4 — Medium Risk: Seed Vault + Sandbox B Hatch
Risk: Medium | Expected Return: 35,000–60,000 coins + chance of rare seeds/plants | Time: 6–9 minutes
The Seed Vault is clearly marked on the map, meaning it's a known PvP hotspot at the very start of each raid. But once the initial wave of players has passed through (or died), it becomes one of the most consistently stocked loot areas on the map.
Step by Step:
- Do NOT spawn directly at Seed Vault — spawn on the south side and approach from below
- Wait 60–90 seconds at a safe holding position — let the initial spawn rush play out
- Enter Seed Vault from the south entrance (less contested than north main entrance)
- Prioritize Raider Bags first — these are guaranteed high-value item drops that players often miss
- Check Weapon Crates second
- If Raider Bags and crates are already looted, leave immediately — don't stay for leftover scraps
- Exit directly south to Sandbox B Hatch — safest extraction on the map
The Raider Bag Priority:
Raider Bags in the Seed Vault often contain high-tier items dropped by players who died trying to fight for this area. They're effectively the spoils of earlier PvP fights delivered directly to you.
Route 5 — Advanced: Bastion Farming Loop (Best Coins Per Hour Ceiling)
Risk: Medium-High | Expected Return: 50,000–100,000+ coins | Time: 10–15 minutes
The Reddit community has documented Bastion farming on Stella Montis as the single highest-ceiling coins-per-hour method on the map. This requires combat capability but is still PvE-focused — you're fighting ARC Bastions, not other Raiders.
Why Bastions?
- Bastions drop Bastion Cells (required for Gear Bench Level 3 Workshop upgrade)
- Bastion Cells sell for significant coin value if Workshop is already complete
- Bastions also drop ARC Alloy, Advanced ARC Powercells (craft into Energy Clips), and other high-value ARC materials
Where Bastions spawn most:
- Assembly Workshops perimeter — patrol routes around the main workshop structure
- Loading Bay outdoor area
- Stella Montis central courtyard during Electromagnetic Storm events
Safe Bastion Fighting Technique:
- Never engage a Bastion in the open — always fight from a doorframe or corner
- Use the door-cover method: stand in a doorway, shoot until the Bastion starts targeting you, step back into the room to break line-of-sight, then re-engage
- Bastions deal massive damage in sustained exposure — the door method completely negates their aggression pattern
- After defeating, loot immediately and move — other Raiders hearing the gunfight will rotate toward you within 60–90 seconds
- Use an Adrenaline Shot post-fight for rapid repositioning before anyone arrives
Exit: After 2–3 Bastions, extract via whichever hatch is closest. Don't push for a fourth fight — the marginal gain isn't worth the risk of an ambush.
🔒 Fuel Cell Locked Storage Rooms — Hidden High-Value Rooms
Every guide on Stella Montis eventually mentions these, and most players never figure out how to access them:
How they work: Scattered across Stella Montis are locked storage rooms that require 4 Fuel Cells to open. Each Fuel Cell spawns in a fixed location near the room it unlocks — typically on shelves, tables, or in adjacent containers within the same small zone.
Where to find Fuel Cell rooms:
- Lobby area — the most accessible fuel cell collection. All 4 cells spawn within the lobby's ground floor
- Sandbox area — cells distributed across the immediate surrounding area
What's inside: High-tier weapon cases, rare tech components, occasional Epic-tier crafting materials. These rooms are worth the 2–3 minutes of cell collection time, especially since most players don't know to look for them.
Safe approach to Fuel Cell rooms:
- Enter the Lobby or Sandbox area after the initial spawn rush (60+ seconds in)
- Collect all 4 cells quickly — they're close together, sub-60-second collection time
- Open the storage room, loot everything
- Exit immediately via the Sandbox B Hatch directly south
🌑 Event Timing Strategy — When to Run Stella Montis
Not all Stella Montis runs are created equal. Certain event conditions transform the map's risk-reward profile:
✅ Best Conditions to Run Stella Montis
EventWhy It's GoodSpecific Bonus🌑 Night Raid | Best blueprint drop rates in the game | Epic and legendary containers increase; exclusive blueprints unlock
❄️ Cold Snap | Cultural Archives loot quality jumps | Breathtaking Snow Globes (7k), Cold Snap-exclusive items
⚡ Electromagnetic Storm | Boss ARC spawns dramatically increase | More Bastions, more Sentinels, more Workshop boss drops
🌪️ Hurricane | Reduced PvP competition | Reduced visibility deters casual PvP players — experienced PvE farmers dominate
❌ When to Avoid Stella Montis
ConditionWhy to AvoidPeak hours, no events | Maximum player density, minimum PvE advantage. PvP risk peaks with no bonus reward
Immediately after a patch | Everyone tests new meta on the highest-loot map. Traffic is unusually high
When your gear is too expensive to lose | Never bring gear you can't afford to lose, regardless of conditions
Best time slot for low-traffic Stella Montis: Off-peak hours (early morning or late night in your region) during an active event. Event benefits apply regardless of server time, but player density drops significantly during off-peak.
🎧 Audio Awareness — Your Best Anti-PvP Tool on Stella Montis
In the tight corridors of Stella Montis, you will hear other Raiders before you see them — if your audio setup is correct.
Critical Audio Settings for Stella Montis
SettingValueWhyNight Mode / Dynamic Range | On | Amplifies quiet footsteps over loud ambient sound
Music Volume | Off | Music masks footstep audio completely
Effects Volume | High | Footsteps, reloading, door interactions — all critical
Headset Type | Closed-back, any | Positional audio separation — know which side a sound comes from
The Sounds You Need to Recognize
- Door opening: Another player is entering or leaving a room — you have ~2 seconds warning
- Container interaction: Someone is looting nearby — they're stationary and distracted
- ARC enemy alert sound: A Shredder or Bastion has detected something nearby — useful for triangulating positions
- Footstep cadence: Running vs walking — running players are aggressive; walking players are cautious looters like you
The audio safety rule: If you hear a door open that you didn't open, stop moving immediately. Crouch. Listen for 5–10 seconds. If you hear looting sounds, they're not looking for a fight — wait them out or route around them. If you hear them move toward you, that's an active push — use your Smoke Grenade and exit toward your nearest hatch.
🧭 The Matchmaking Exploitation Strategy
This is the most underutilized technique for making Stella Montis consistently peaceful:
Embark's behavior-based matchmaking system tracks your PvP behavior. The more you engage in combat (even defensively), the more aggressive your lobby composition becomes over time. The system is designed to match aggression with aggression.
How to shift your matchmaking pool:
- For 5–8 sessions, avoid all combat entirely — even when you could win
- If shot at, use Smoke + Adrenaline Shot to disengage and run
- Do not shoot back, do not chase, do not engage
- Extract every run cleanly without kills
After this period, your lobby composition will shift noticeably toward players who are also farming and looting rather than hunting. You'll see less aggressive behavior, more players ignoring each other at shared POIs, and more peaceful extractions.
Then: Once in the quieter lobby pool, equip your Looting Mk.2, bring a minimal custom loadout, and run your full Stella Montis routes without being hunted by aggressive PvP players. This is how experienced farmers maintain peaceful farming conditions indefinitely.
📋 Stella Montis PvE Safety Cheat Sheet
SituationCorrect ActionHear a door open | Stop moving, crouch, listen for 5–10 seconds
See a looted container | Someone was here recently — alter your route
Found a 5k+ trinket | Safe Pocket it immediately
Bag is 70% full | Start routing toward your planned hatch
Hear gunshots nearby | Move away, not toward — let the fight resolve
Spotted by a player | Smoke Grenade + Adrenaline Shot, run to hatch
ARC Bastion spotted | Door-frame cover method, disengage after 2–3 hits
Fuel Cell room nearby | Collect all 4 cells quickly, loot room, exit south
Workshop breach rooms | Only enter if you have a breach charge ready
Cold Snap is active | Prioritize Cultural Archives immediately
Night Raid is active | Prioritize Assembly Workshops for blueprint probability
🎯 The Complete "Safe Stella Montis" Session Template
Here's the exact session structure used by players consistently hitting 45,000–65,000 coins per run with near-zero gear loss:
Before deploying:
- Set up Custom Free loadout (cheap weapon + small shield + 1 medkit)
- Confirm Looting Mk.2 or Mk.3 augment is equipped
- Pack 2× Adrenaline Shot + 1× Smoke Grenade
- Check map events — Night Raid or Cold Snap active? Adjust target POI accordingly
Minutes 0–3 (Early Raid — High Traffic):
- Spawn on western or southern edge — avoid central spawn points
- Do NOT rush to main POIs — hold at a secondary area or move slowly toward the workshop periphery
- Let the initial player traffic flow through the contested zones
- Listen constantly for audio cues
Minutes 3–8 (Mid Raid — Clear Zone):
- Move to your chosen route: Assembly Workshop Stands → Thruster Breach Rooms → Staff Room
- Safe Pocket your first 3,000+ coin item immediately
- Loot methodically — open every container in the path, drop lowest-value items as better ones appear
- Stay away from Medical Research (north) — still contested at this point
Minutes 8–12 (Late Raid — Extract Window):
- Evaluate bag value: if 50,000+ coins of loot, route to nearest hatch immediately
- If bag has room, check Cultural Archives (east approach) or Fuel Cell rooms (Lobby/Sandbox)
- Do not push deeper into red zones at this stage — the extraction risk increases every minute you stay
Extraction:
- Route to planned hatch (Assembly Workshop Hatch, Eastern Tunnel, or Sandbox B)
- Use Adrenaline Shot in the last 30 seconds if running to the hatch through open areas
- Extract cleanly
Expected result: 45,000–65,000 coins per run, Workshop materials collected, blueprint probability engaged, Safe Pocket protected.
🏁 Final Thoughts: Stella Montis Belongs to Patient Raiders
The players who lose gear on Stella Montis consistently are rushing. They're sprinting to the best room, engaging fights they don't need to take, staying too long because the loot is good, and exiting through the main extraction because it's the most obvious option.
The players who extract consistently and profitably are doing the opposite: spawning at the periphery, waiting out the early traffic, looting the same high-value spots methodically, Safe Pocketing their best find within the first 3 minutes, and exiting via hatches the other players don't know about.
Stella Montis rewards patience, map knowledge, and the discipline to walk away from a good room when you hear a door open. Master those three things, and the map's reputation for "being dangerous" becomes your personal competitive advantage — because while everyone else is fighting for the loot, you're already at the hatch.
Which Stella Montis route are you going to try first? Are you a Workshop Stands runner or ready to find those Thruster Breach Rooms? Drop your first run results in the Farfosh comments — we want to know how it goes. 🎯