ARC Raiders Expedition System Explained: The Complete Guide Every Raider Needs to Read Before Dropping In
If you've spent any time in ARC Raiders, you already know the loop: drop topside, loot everything that isn't bolted down, survive both the machines and the other Raiders trying to kill you, and extract alive. It sounds simple on paper. In practice, it's one of the most nerve-wracking, pulse-pounding gaming experiences available right now. But here's the thing — a huge portion of players are leaving serious advantages on the table because they don't fully understand one of the game's most critical pre-raid systems: the Expedition.
The Expedition isn't just a loading screen you click through to get topside. It's a layered decision-making framework that determines where you go, what you might find, when you can go, and how prepared you'll be when you land. Get it right, and you'll be extracting with stacked loot and a clean record. Get it wrong, and you're handing other Raiders a free win at your expense.
This guide is going to fix that. We're going to break down every element of the Expedition system in ARC Raiders — from the basics of launching a raid to the new Expedition Window feature introduced in the Shrouded Sky update — and then we'll go deeper into connected systems that every serious player needs to understand: Map Conditions, Squad Loadout Strategy, and Risk Calibration. By the end of this, you won't just understand what the Expedition screen is — you'll know how to weaponize it.
Let's go.
What Exactly Is an Expedition in ARC Raiders?
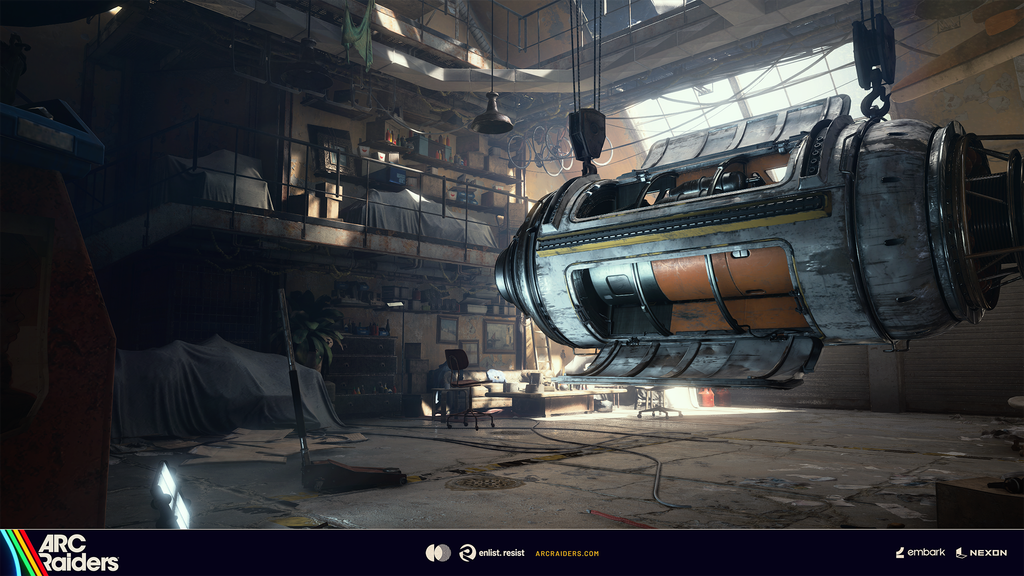
At its most fundamental level, an Expedition is the act of launching a raid into the topside world of the Rustbelt. You're a Raider operating out of an underground shelter called the Shard — a base of operations where you craft, manage your stash, equip your loadout, and coordinate with your squad. Every time you leave the Shard and venture to the surface, that's an Expedition.
But unlike many extraction shooters that let you simply queue and drop with minimal friction, ARC Raiders wraps the Expedition launch in a deliberate set of decisions. You're not just pressing "Play." You're committing resources, making strategic choices about gear, and — with the new Expedition Window system — now factoring in timing as well.
Think of it less like queuing for a match and more like planning a heist. The planning phase matters just as much as the execution.
The Shard: Your Home Base Between Expeditions
Before we go deeper into Expeditions themselves, it helps to understand what you're coming from. The Shard is your underground hub — a visually striking, lived-in space that serves several functions:
- The Workbench — where you craft weapons, ammo, consumables, and gear upgrades
- Your Stash — the secure storage where successfully extracted loot is kept safe
- The Loadout Screen — where you equip everything you'll carry topside
- The Squad Hub — where you form parties and coordinate before dropping in
Everything you extract successfully from a raid goes into your stash. Everything you bring topside and fail to extract is lost. That asymmetry is the heartbeat of the extraction genre — and it starts with how well you plan your Expedition.
The Expedition Launch Screen: What You're Actually Looking At
When you approach the Expedition launch point in the Shard, you're presented with a pre-raid interface that gives you key information before you commit. Here's what you're working with:
Map Selection
ARC Raiders features multiple topside maps — sprawling, open environments with distinct layouts, loot concentrations, and ARC enemy distributions. At the Expedition launch, you can see which maps are currently available and, crucially, what conditions are active on each one.
This is not a small detail. The map condition completely changes the nature of the raid you're about to enter. More on that in a dedicated section below.
Squad Configuration
Solo, duo, or full squad — your composition choice here carries enormous tactical weight. Running solo means faster movement and less noise, but zero backup if things go wrong. A full squad of three means more firepower and support, but also means sharing loot and coordinating three different players' risk tolerances.
The right squad size depends on:
- What you're trying to accomplish — farming specific resources, hunting other players, completing quests, or just survival runs
- The active map condition — some conditions heavily favor squads (like the Hurricane, where low visibility makes getting separated lethal)
- Your current gear tier — if you're running high-value equipment, having backup is almost always worth it
Loadout Commitment
Before you launch, you're locking in your loadout. Every item you bring topside is at risk. If you die and don't get revived (or can't recover your body), those items are gone. This is the most psychologically weighted part of the Expedition process — and where most new players make their biggest mistakes.
The golden rule: don't bring more than you're willing to lose. Especially when you're learning a new map, running in a new squad, or heading into an unfamiliar map condition.
The Expedition Window: The Shrouded Sky Revolution
Here's where things get especially interesting for 2026 players. The Expedition Window is a brand-new feature introduced in the Shrouded Sky (Patch 1.17.0) update, and it represents one of the most meaningful additions to the pre-raid experience since the game launched.
What Is the Expedition Window?
The Expedition Window is essentially a time-based availability system that governs when specific Expeditions can be launched. Rather than every raid type being perpetually available at all times, certain Expeditions — particularly those tied to specific map conditions, events, or content — now operate within defined windows of availability.
This has several immediate gameplay implications:
- Scarcity creates value. When a high-reward Expedition is only available for a limited window, the decision to enter it becomes weightier. You can't just "do it later." Later might mean the window is closed.
- Community convergence. When all players know that a specific window is active, squads tend to converge on that map simultaneously. This creates denser, more intense lobbies — higher risk, higher reward, higher drama.
- Planning and preparation matter more. You can no longer approach ARC Raiders as a purely reactive game where you just log in and run whatever. The Expedition Window system rewards players who check what's available, prepare the right loadout, and act decisively.
- FOMO is now a design element. Embark Studios is deliberately using the Expedition Window to create moments — specific, time-limited opportunities that Raiders will remember and talk about. This is excellent live-service design.
Expedition Windows and Map Conditions
The Expedition Window system intersects directly with map conditions, and this is where its depth really shows. A Hurricane map condition might only be available for a specific window. During that window, the map is active and playable. Outside of it, that specific version of the map — with its storm, its new ARC enemy types, its altered sightlines — simply isn't accessible.
This means:
- The new enemies introduced in Shrouded Sky (the ones lurking under storm cover) may only be huntable during hurricane windows
- Specific loot tables and rewards tied to the storm may be exclusive to that availability period
- Strategic players will track windows and adjust their daily play sessions around them
It transforms the game from a static playground into a living, shifting world with rhythm and schedule.
Map Conditions: The Expedition Variable That Changes Everything
Map conditions deserve their own dedicated spotlight because they are, without question, one of ARC Raiders' most underappreciated systems. A map condition is essentially a modifier applied to an entire topside environment that changes the rules of engagement for every single player in that session.
Current Map Conditions in Rotation
The Hurricane (Shrouded Sky Update)
The newest and most intense condition currently in the game. Violent storms sweep the topside, carrying:
- Dramatically reduced visibility — spotting enemies at any meaningful distance becomes a genuine challenge
- Hurtling debris as a physical environmental hazard
- Powerful gales that affect player movement
- Exclusive new ARC enemy types that only appear under storm cover
The Hurricane fundamentally favors close-quarters, mobile play over sniping and long-range camping. If your loadout is built around precision long-distance engagements, you either adapt or you suffer.
The Cold Snap
The predecessor weather event to the Hurricane. The Cold Snap brought freezing temperatures and unique environmental challenges. Players who learned to work with the Cold Snap — using the visibility advantages and movement patterns it created — found themselves with a significant edge over those who simply braved it without adaptation.
Bird City
A unique map condition that brings unusual activity to certain areas — characterized by elevated presence of specific ARC variants and adjusted loot distributions (including the now-reduced rare loot in chimneys, as patched in 1.17.0). Bird City rewards players who understand where high-value loot clusters and which ARC types to prioritize.
Standard Conditions
Not every Expedition has an active weather modifier. Standard condition runs offer the "baseline" Rustbelt experience — which is still punishing and rewarding in equal measure, but without the additional layer of environmental management.
Reading the Condition Before You Drop
The most important habit you can build as an ARC Raiders player is reading the map condition before you finalize your loadout. Here's a practical pre-Expedition checklist based on conditions:
Map ConditionRecommended Loadout ShiftStrategic PriorityHurricane | Close-range weapons, movement items | Stay mobile, use storm for cover
Cold Snap | Insulated gear, mid-range weapons | Control indoor spaces
Bird City | Balanced loadout, extra carry capacity | Target chimney loot runs
Standard | Flexible — play to your strengths | Prioritize high-value zones
Squad Roles and Expedition Coordination
One area where ARC Raiders distinguishes itself from many extraction shooters is in how genuinely different squad roles can be. This isn't a game where three people run the same loadout and hope for the best. Smart squads specialize — and the Expedition screen is where that specialization gets coordinated.
The Three Pillars of a Strong Squad
The Carrier
This Raider prioritizes carry capacity and stash management. They bring extra bag space and utility items, and their job is to maximize the amount of loot that makes it to extraction. The Carrier is often the last to engage in a firefight — they're too valuable to risk.
The Combatant
The squad's primary engagement specialist. They carry the best weapons the squad can afford, run mobility items for flanking, and are responsible for clearing ARC threats and engaging rival Raiders when necessary. In hurricane conditions, the Combatant becomes the most critical squad member by a significant margin.
The Support
The glue player. The Support brings healing items, shields, utility deployables (like the newly added Shaker instrument field craft item from 1.17.0), and revive equipment. A good Support player doesn't top the kill chart — they make sure everyone else can.
Coordination at the Expedition Screen
Before you launch, your squad should have consensus on:
- Primary objective — loot run, quest completion, ARC hunting, or PvP hunting
- Extraction plan — which extraction point you're aiming for and a backup
- Bail-out threshold — at what point does the squad cut their losses and extract early
This sounds like overthinking for a video game. It isn't. Squads that have these conversations in the 60 seconds before dropping have dramatically higher extraction rates than those who just rush in.
Risk Calibration: The Expedition Mindset Every Raider Needs
Let's talk about something that no tutorial teaches you, no patch note covers, and no stats screen measures — but which separates consistently successful Raiders from players who constantly struggle: risk calibration.
Risk calibration is the ongoing mental math you perform throughout every stage of an Expedition. It starts at the loadout screen and doesn't stop until you're safely extracted.
The Loadout Risk Assessment
Every item in your loadout has a risk cost. The question isn't "what is this item worth?" — it's "am I willing to permanently lose this item in exchange for the potential gain this run offers?"
A few frameworks:
The Replacement Cost Rule: Only bring items you can replace within 1-2 future crafting sessions. Running your single best weapon on a risky map condition Expedition is emotional decision-making, not strategic decision-making.
The Tier Matching Rule: Match your gear tier to the risk level of the run. Heading into a hurricane window with new ARC enemy types and likely dense player lobbies? This is a high-risk run. Bring gear that's strong enough to be functional but not so rare that losing it hurts your entire progression.
The Insurance Run Concept: If you've had a streak of good extractions and your stash is healthy, you've "earned" a high-stakes run with premium gear. If you've been struggling and your stash is thin, this is a recovery run — go conservative, focus on stash-building basics, and resist the urge to gamble.
In-Raid Risk Pivoting
Risk calibration doesn't stop when you land. It's a live process:
- You've looted well in the first 10 minutes. The rational move is often to start moving toward extraction now, rather than greedily pushing for more. The more you carry, the more you have to lose.
- You've heard a large ARC machine nearby. Does engaging it make sense? Evaluate the reward against the noise you'll generate (which will bring other Raiders) and the damage you might take.
- Another squad just wiped a third party. They're likely damaged and possibly low on ammo. This is a high-reward engagement opportunity — but only if you have the tools and positioning to capitalize.
Every decision is a probability calculation. The best Raiders in the world aren't the ones who win every fight. They're the ones who pick the right fights.
Progression and What You Bring Back: The Extraction Economy
Everything you do in an Expedition feeds back into your home base progression — and understanding this economy makes you a better decision-maker in the field.
Crafting-First Mentality
ARC Raiders rewards players who think of each Expedition not as "how many kills did I get" but "what did I bring back to build with." Crafting materials, salvageable weapon parts, and rare components are the real currency of your progression. Kills are satisfying; extracted loot is advancement.
The Energy Clip — now available by default from the Workbench following the 1.17.0 patch — is a good example of how Embark has made the crafting system more accessible. Lowering the barriers to building solid gear means that smart players who focus on looting efficiency can upgrade their capabilities faster than players who prioritize combat above everything else.
Feats and Daily Objectives
The revamped Feat system (which removed PvP Feats entirely in Shrouded Sky) now heavily rewards play that aligns with smart Expedition behavior:
- Complete extraction-based objectives
- Engage specific ARC enemy types
- Loot from particular zones or under specific conditions
With three free daily rerolls now available, you have the flexibility to customize your daily Feat targets toward runs that match the map conditions and your playstyle, rather than being forced into awkward objectives.
Advanced Expedition Tactics: Tricks the Best Raiders Use
Let's close out the tactical section with some advanced strategies that separate the extraction veterans from the newcomers.
The Ghost Entry
Don't land in the loudest, most contested areas just because they have the best loot density. Elite Raiders often prefer "ghost entries" — landing at quieter edges of the map and rotating toward high-value zones after other squads have already cleared the initial ARC presence. You benefit from their work while avoiding their attention.
Storm Chasing in Hurricane Conditions
Counterintuitively, moving toward the storm's center during hurricane conditions (rather than avoiding it) can be extremely effective. Most players instinctively retreat from the worst visibility zones — meaning the loot and ARC enemies in those areas are left untouched. High risk, high reward. Bring a close-range weapon and trust your ears more than your eyes.
The Patience Extract
The extraction meta in ARC Raiders heavily rewards patience over aggression. If you're carrying significant loot and you know an extraction point is contested, sometimes the right play is to find a defensive position, wait, and let other squads burn each other down. Move to extract when the coast is clear.
Tracking ARC Sounds for Intelligence
Every ARC machine type produces distinct audio signatures. Learning these sounds gives you constant intelligence about the map state without having to visually scout. Large ARC machines are loud — and their sounds travel. If you hear a Behemoth-class machine in the distance, you know where players are likely gathering (and fighting). Use that intelligence.
Conclusion: Master the Expedition, Master the Game
ARC Raiders is a layered, demanding, and deeply rewarding game — but its depth only reveals itself to players who engage with all of its systems intentionally. The Expedition isn't just a loading screen. It's the strategic moment that frames every single thing that follows.
With the Expedition Window now live as of Shrouded Sky, the game has taken a significant step toward making that pre-raid decision space even richer. Timing matters. Preparation matters. Knowing what condition is active, what enemies are lurking under the storm, and what your squad is there to accomplish — that knowledge is your greatest weapon before you even pick up a gun.
The Rustbelt doesn't reward the reckless. It rewards the prepared, the adaptable, and the patient. Plan your Expeditions like they matter — because they do.
Now we want to hear from you: How do you approach the Expedition screen? Are you a "gear up and go" type, or do you meticulously plan every run? And with the Expedition Window now in play, has it changed when you log in to play? Drop your thoughts in the Farfosh comments — the community is ready to talk strategy. 🎯